Automatic creation of return shipment
Configuration
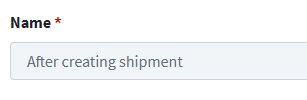
1. In the left menu in the Cloud App, click After Creating shipment under Configurations .

2. On the main page, create an Event by clicking on Add Event After creating shipment .
3. Rename the event in the Name field to Create Return Shipment .
4. Click Save and Close 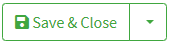
5. On the main page, click on Task to display the drop-down menu
6. Choose the Create returns shipping option 
7. On the configuration page, choose the options from the drop-down menu on the left under Returns destination.
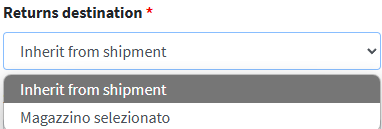
Inherit from shipment : to inherit the choice from the shipment.
Selected warehouse : to select a possible return warehouse created in the 📄 Warehouses guide
8. By selecting the Selected Warehouse item, the Configuration fields appear on the screen.
9. In the Warehouse field, select the Return Warehouse to use for return shipments.
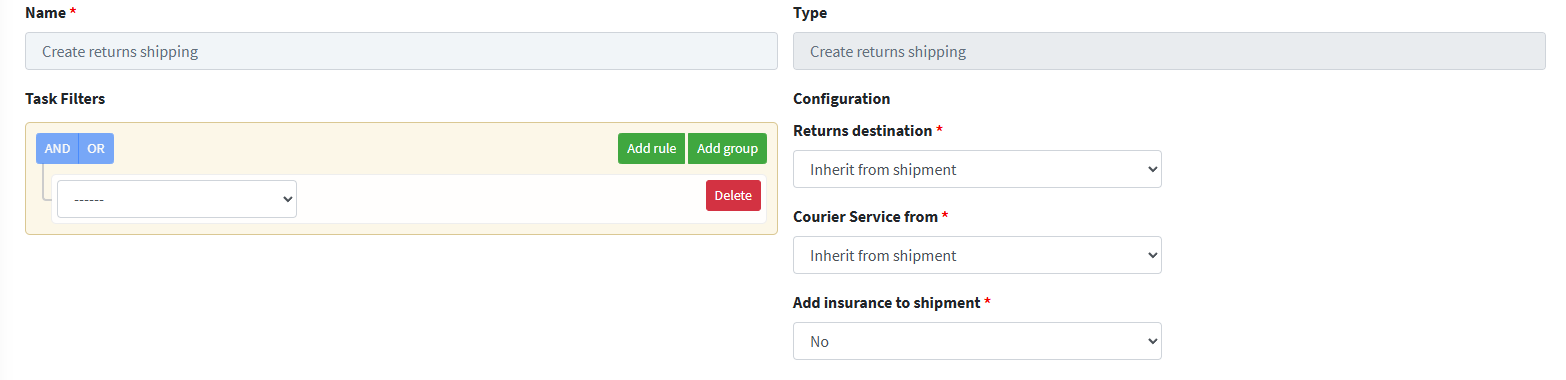
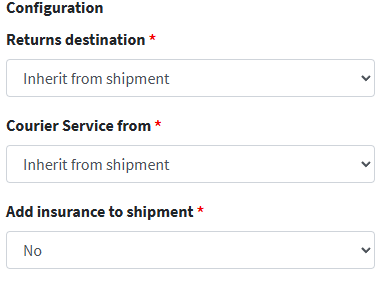
10. In the 'Shipping service from ' field , specify the shipping service to use for returns by selecting one of the two options available in the drop-down menu.
- Inherit from shipment : allows you to automatically inherit the courier used in the original shipment , simplifying the operational flow and maintaining consistency with the outgoing process.
- Selected courier service : allows you to manually choose an alternative shipping service , selectable via a drop-down menu based on availability or logistical needs.
11. In the "Add insurance to shipment" field , you can indicate whether or not to apply insurance to the return shipment. This selection must be made by choosing one of the options available in the drop-down menu , based on company policies or logistical needs.
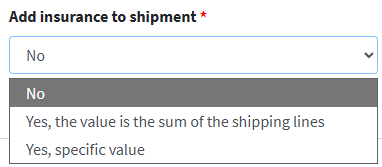
- No : Select this option if you do not want to apply insurance service to the return shipment.
- Yes, the value is the sum of the shipping lines : activates an insurance whose value is automatically calculated on the sum of the shipping lines , useful for standardized and rapid management.
- Yes, specific value : allows you to use an insurance with a custom value , to be entered manually in the "Insurance Value" field , indicated in local currency or as per internal policy.
