PrestaShop
Introduction
The integration between Logivery and PrestaShop allows you to simplify and automate order management and logistics flows, centralizing all operations in a single platform.
Thanks to this connection, orders generated on PrestaShop are automatically imported into the Logivery Cloud app , ensuring constant and precise synchronization between systems.
Logivery Configuration
1. To begin the integration between Logivery and PrestaShop, the first step is to create a dedicated connector, which allows communication between the two systems automatically and securely.
2. Click Connectors ( 📄 Sales Channels & Connectors ) in the left menu under the Configurations heading.
3. Click Add Connector at the top right 
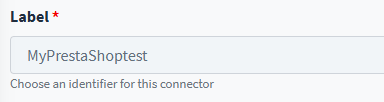
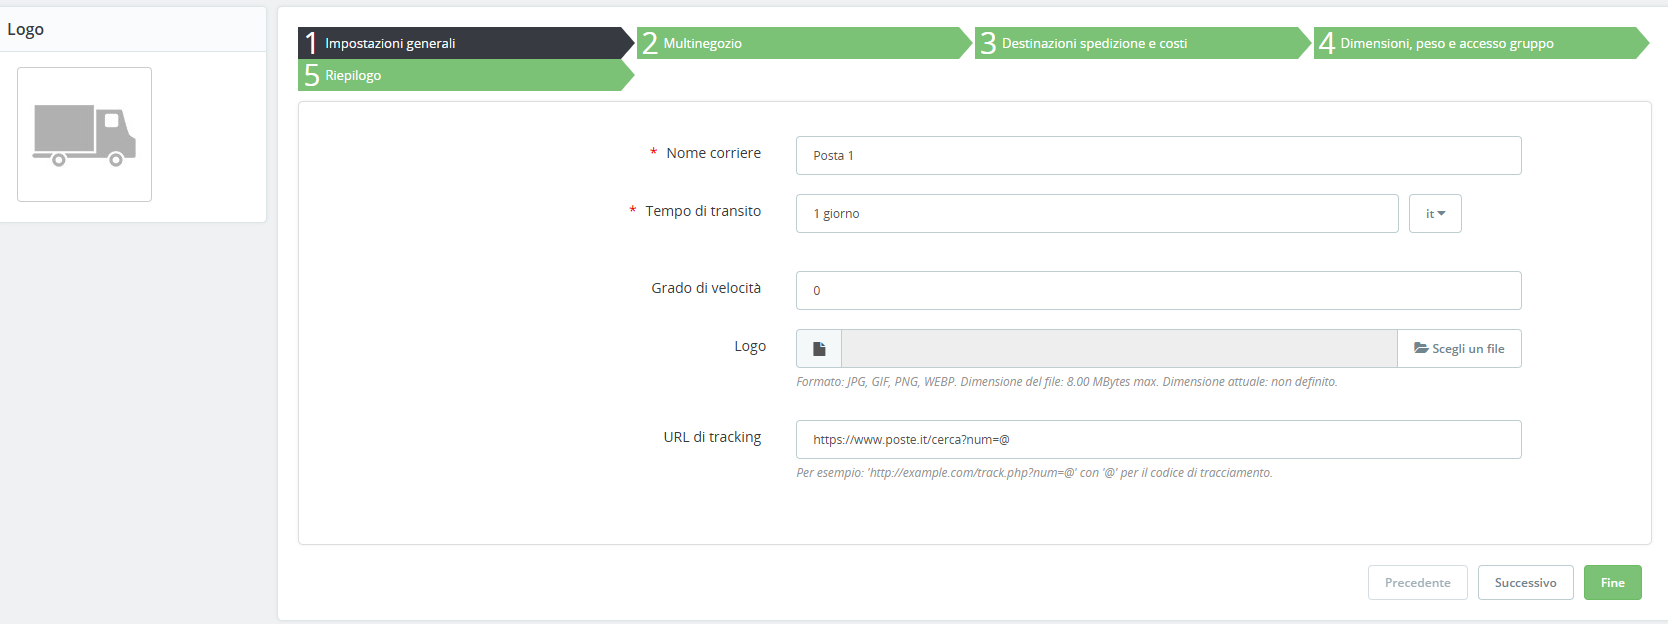
5. On the PrestaShop connector configuration page , one of the first fields to fill in is the connector identification label.
6. In the PrestaShop connector configuration page , the “ Website URL ” field is essential: here you need to enter the complete address of your PrestaShop store, i.e. the domain through which it is accessible online.

7. Click Save & Continue to finish.
8. Once you have completed the initial configuration of the PrestaShop connector and clicked “Save and continue” , the system automatically generates two key elements:
- Authorization token : A unique key that allows PrestaShop to communicate securely with the Logivery Cloud app.
- Logivery App URL : The address to enter in the PrestaShop module to establish a direct connection with the Logivery platform.

9. After configuring the connector and obtaining the authorization token and the Logivery app URL, the last step is to download the Logivery module compatible with your PrestaShop version.
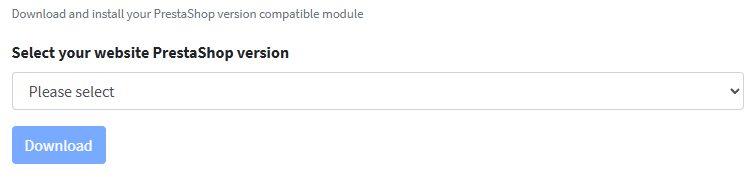
To check the version of PrestaShop installed on your system, just follow this simple step:
Log in to your PrestaShop store's admin panel and look at the top left , near the logo: there you will find the version currently in use , for example 8.0.4 .

10. Once you have verified your PrestaShop version (e.g. 8.0.4), you can proceed with the final integration step:
Click on “Download” to start downloading the compressed (ZIP) file of the Logivery module compatible with your version of PrestaShop .

Uploading the module to Prestashop
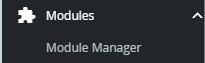
1. From the PrestaShop side menu, select “ Modules ” and then click on “ Module Manager ”.
2. On the Manage Forms page, click Upload a Form at the top right to open the file upload window.
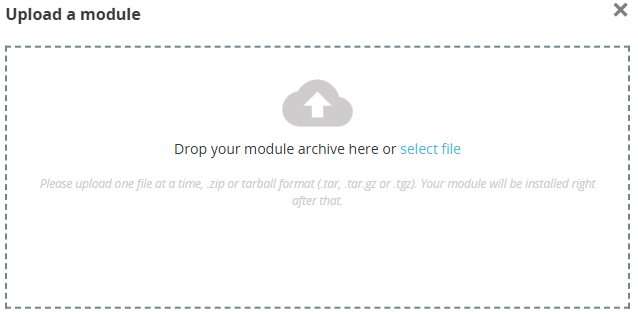
3. Select the downloaded module zip file and wait for it to install.
4. Once the installation is complete, click Configure.
Prestashop Configuration
1. The 'Logivery ' item is now visible in the PrestaShop left menu , within the ' Configure ' section.
2. Once in the 'Logivery ' section, a panel is displayed to set all the parameters necessary for configuration.
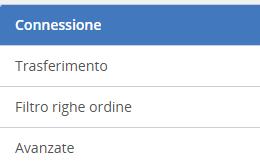
Connection
1. On the Connection page, you will be asked to enter the authorization token and Logivery app URL you created earlier when creating the connector.

2. Press Save to complete the operation 
and then Test Connection to test the connection.
Transfer
1. In the Transfer menu the first option to set is Cash on Delivery .
The selectable options are:
- ps_checkpayment: This is a payment method where the payer issues a check.
- ps_wirepayment: is an electronic payment method that allows you to transfer funds from one bank account to another (bank transfer).
- ps_cashonldelivery: is a payment method in which the recipient pays for the goods or services upon delivery in cash (the one to be selected).

2. In the Odini Shipping Status field , select the status to consider as shipped.

3. In the Order Delivered Status field , select the status to consider as delivered.

4. Click on the " Automatic Transfer " button to enable automatic order synchronization from Prestashop to Logivery.
If automatic transfer is disabled, many options will disappear from the screen; the only options present will be the status filters. 
5. In the " Maximum number of orders sent " field , set the limit of orders that the system can simultaneously transfer from Prestashop to the Cloud app.

6. In the Select stores to sync field, the user can choose to sync only orders from specific stores.

7. In the “ Period: last N days from order creation or modification ” field, you can set the time range within which orders will be accepted for automatic transfer.

8. In the “ Transfer orders to status ” field, select the statuses that indicate the payment made by the customer, so that they are eligible for transfer to the Cloud app for shipping.

9. In the Payment Method field you can select a payment method from:
- Payment by check
➝ Method: ps_checkpayment
The customer sends a check; the order is confirmed only after payment is received. - Bank Transfer
➝ Method: ps_wirepayment
The customer makes a wire transfer to the store's account; the order is processed upon receipt of the wire transfer. - Cash on delivery
➝ Method: ps_cashondelivery
The customer pays the courier upon delivery of the product.

10. In the " Shipping Method " field, you can select the couriers you want to use. If the field is left blank, all available couriers will be automatically enabled.

11. In the Destination field you can enter any preferred destination.

12. In the Minimum amount field the user can define the minimum amount for an order.

13. Click Save to finish.
Order Line Filter
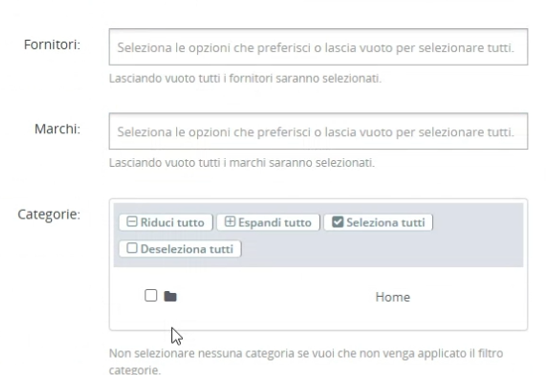
1. In this screen, the user can choose to transfer only the order lines associated with a specific supplier or brand, rather than processing all existing lines.
2. Click Save to finish.
Advanced
1. User has the option to enable Debug mode to get more information from the logs .

2. Enabling Delete data when uninstalling the module will delete all related data.

3. Click Save to finish.
Debugging
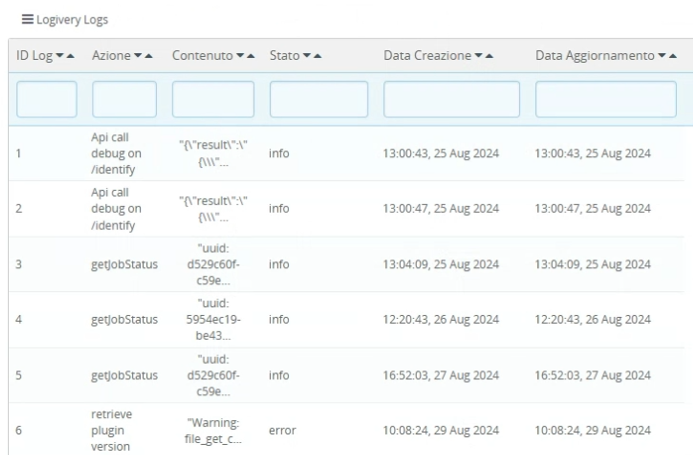
1. If Debug mode is active, the user can consult the logs of the activities performed.
Orders from Prestashop
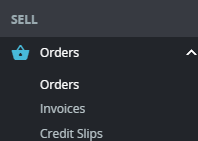
1. Click on “ Orders” in the left navigation menu, within the “ Sell ” section.
2. On the “ Orders ” page, you will see the complete list of all orders registered on PrestaShop.

Order Statuses
1. To check the status of orders, the user can consult the icons displayed in the “ Logivery Status ” column.
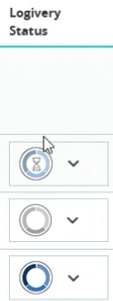
- Order not synchronized
The displayed icon is light gray .
This status indicates that the order has not yet been synchronized with Logivery. - Order waiting to be synchronized
The displayed icon is a light-colored hourglass .
This status indicates that the order is waiting to be synchronized with Logivery. The process may be in progress or in queue. - Order synchronized
The displayed icon is colored .
This status confirms that the order has been successfully synchronized with Logivery.
Courier recognition
1. When an order is updated from Logivery to PrestaShop , the information relating to the carrier used for shipping is automatically transferred to the PrestaShop system.
This information can be found on the order detail page , in the field called “Shipping method” .

2. To ensure correct synchronization between Logivery and PrestaShop , the courier's shipping ID must match perfectly in both systems. Only in this way will the order status information from Logivery to PrestaShop be correctly updated. In Logivery, you can change the courier's ID in the main shipping service features in the External Reference field .

In PrestaShop , the courier name can be configured by accessing the Shipping → Shipping means menu , within the section dedicated to courier parameters .
From the list of couriers displayed on the screen, select the desired one by clicking on its name.
You will be taken to the General Settings screen , where you can change courier-specific parameters.
3. When Logivery updates the shipping status and automatically synchronizes it with PrestaShop , the tracking link associated with the order is also generated .
This link is visible in PrestaShop under the Tracking Number heading , within the order details , in the Shipping Methods tab .
Order synchronization
1. Returning to the Orders page, the user sees the newly created order in the list with the status Not Synced .

2. Click the sync menu icon to start it.
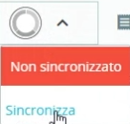 (light gray icon)
3. The order status enters the queue for synchronization.
 (light colored icon with hourglass)
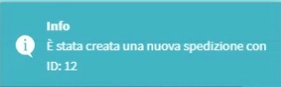
4. Returning to the Cloud App , at the top, a message notifies us of the creation of the order with a given ID.
5. The order is now visible in the cloud apps list .

6. Click the order lines menu to view the summary.
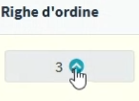
The order summary displays the following information for each line:
- ID : unique identifier of the order line
- Item code : internal product code
- GTIN code : international standard code (Global Trade Item Number)
- Title : Product name or description
- Quantity : number of units ordered
- Unit value : price per single unit of the product

Delete order
1. In the Prestashop order list you can also cancel an order.
2. Click on the order status menu to view available options.
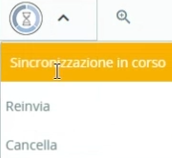
3. To cancel, click Cancel .
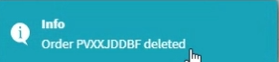
4. Once back in the Cloud app, a message at the top notifies us that the order has been canceled.