Zucchetti Ad Hoc Revolution
Zucchetti Ad Hoc Revolution
Authentication
1. In the Zucchetti App, enter your authentication data to log in as a user.

The system will check for database and program changes and then log you in.
Module configuration
1. To connect the Zucchetti environment to the Logivery Cloud App, you need to enable the Zucchetti eCRM module .
2. To activate the module, click on the System drop-down menu at the top and then on Activate procedure.
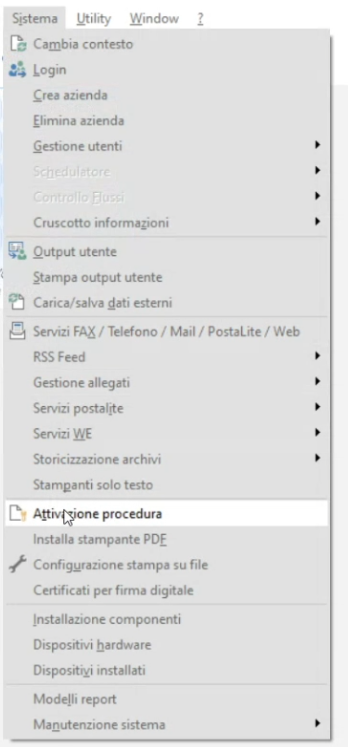
3. In the Procedure Activation screen , click on Installed Modules at the top, the user will be able to view the entire list of modules installed or still to be installed.
4. Flag the Zucchetti eCRM module .

5. Once the Zucchetti eCRM module is activated , click on Modules in the main menu at the top .
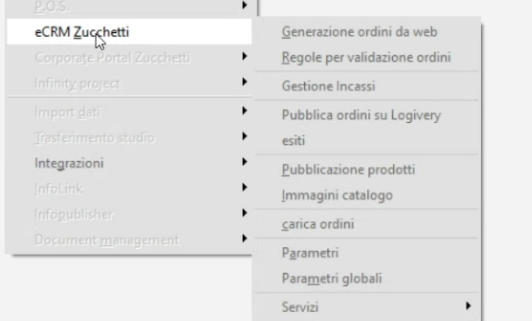
6. As you can see in the example, the items Publish orders on Logivery and Outcomes will appear in the list under eCRM Zucchetti .
Transfer orders to the Cloud App
1. Click on Publish Orders on Logivery.
2. The Generate documents from orders screen will appear .
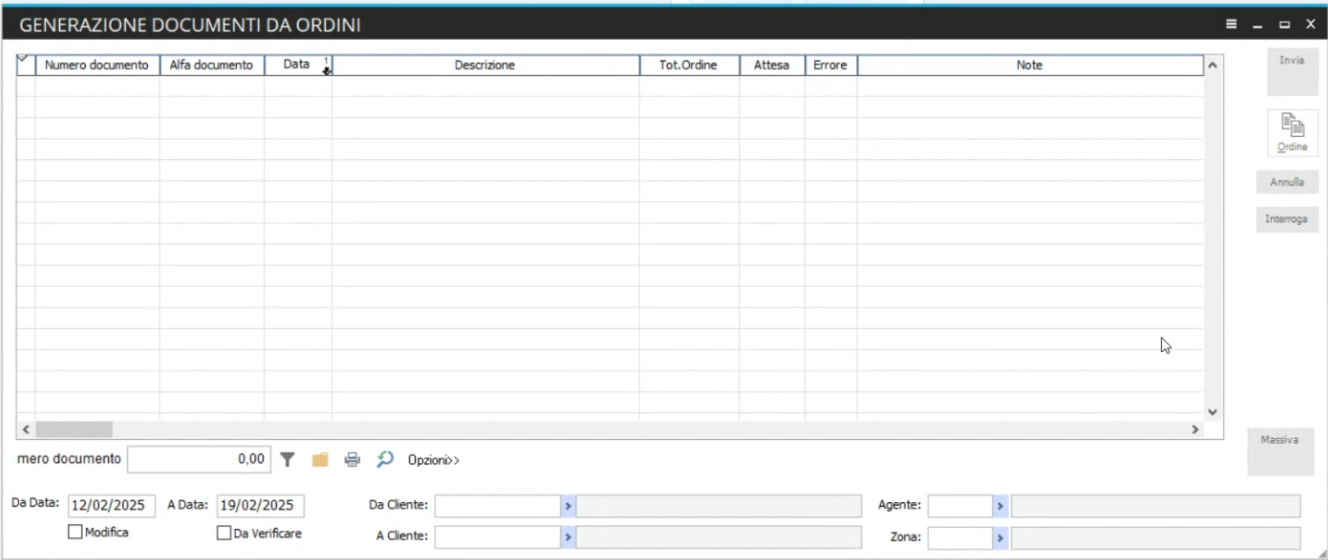
3. On the right, click on Query to retrieve orders not yet sent to the Cloud App based on the date shown in the options at the bottom left.

4. All orders to be sent to the Cloud App will appear on the screen .

5. To send orders, select them from the menu by flagging the items of interest and then click on the Massiva button at the bottom left.
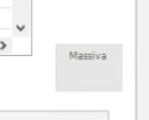
6. By clicking on Massiva for the first time, the Zucchetti system will check the orders for any errors and send them to the Cloud App.

7. To have a one-to-one response also from the Cloud App, you need to select the order items again and then click on Massive again . In this case, if there are no problems, the orders will disappear from the list on the screen.
Results Table
1. To view all the sending operation logs on the Cloud App, click on Modules and then on eCRM Zucchetti and select the Results item .
2. The list of Logivery Query Logs will appear on the screen .
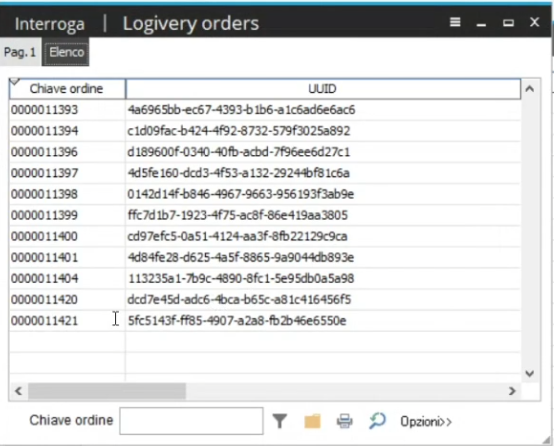
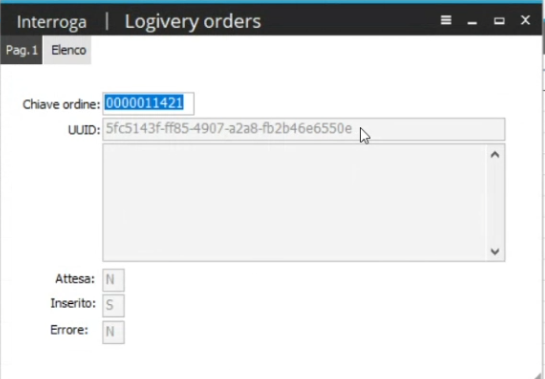
3. Click on an entry under the UUID column to view the Log information :
- Order Key
- UUID
- Waiting-Inserted-Error
Error sending order
1. In the event of an order sending error after Mass Sending, a message will appear on the screen describing the data to be corrected.
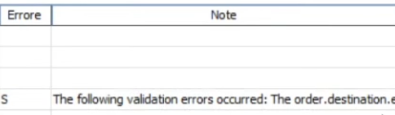
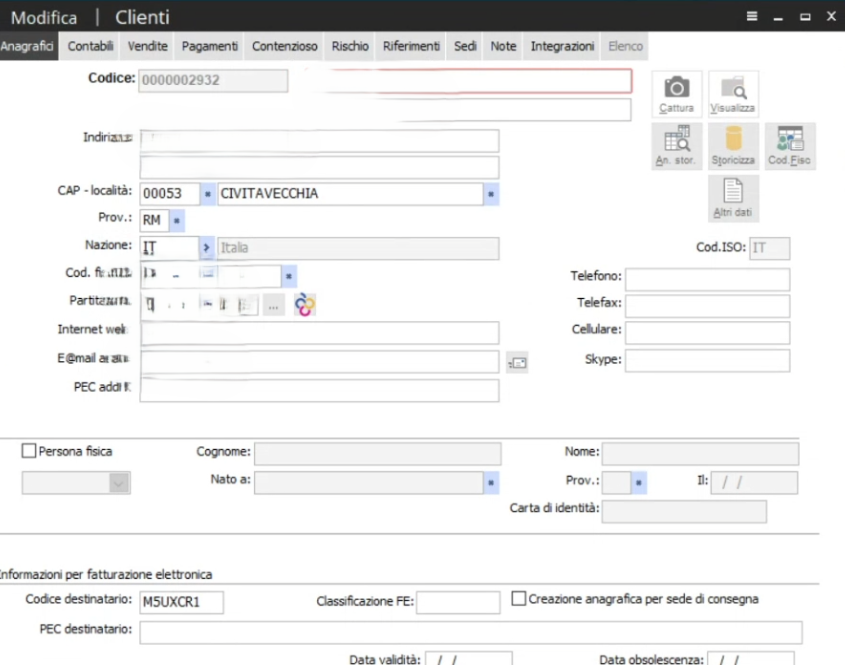
2. To correct the order click on the Order icon on the right.

3. All the order fields will appear on the screen so you can correct any errors.
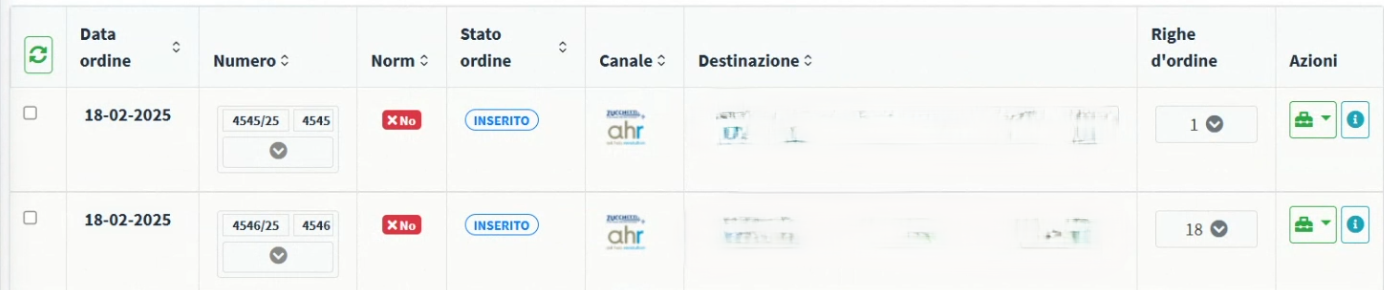
Orders in the Cloud App
1. Once any errors have been verified and corrected, the user will find all the orders listed in the Cloud App ready to be normalized and sent for shipping.
Please refer to the guides 📄 Order normalization and 📄 Shipment generation