Common parameters of shipping services
Configuration
1. To access the section, click on Courier Services in the left-hand menu under the Settings heading.

2. The user accesses the page with the list of all created and configured Shipping Services .

1. To create a new shipping service click on Add Courier Service at the top right
2. The user views the page with the list of available couriers that can be used to create the shipping service. Clicking on the desired courier takes you to the parameters configuration page.
Main features
1. In the main features the user must enter all the data relating to the configuration of the packages.
2. On the Main Features page, enter the code referring to the courier used for the shipment (e.g. Poste Italiane) in the External Reference field.

3. Next, choose the shipping service you want to use.

Service Features
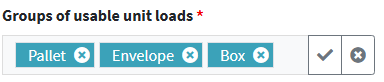
1. In the Packaging Types box , choose the ones you want to use for shipping.
Unit of measurement
2. Enter the units of measurement used for shipping the package in the next 3 fields:
- Linear unit of measurement
- Unit of measurement of weight
- Currency

3. There are parameters that define the limits within which you can manage certain shipping services. Fill in the following fields to define these parameters.

The following describes the dimensional and weight parameters that can be used for configuring shipments:
Maximum Weight
- Value that defines the maximum weight allowed for the package to be shipped.
- You must comply with the limits imposed by the courier and the selected service.
Perimeter dimension of the small face plus one side
- It is determined by adding:
- the length of the smallest face of the package
- to the perimeter of the cross-section (2 × height + 2 × width).
Perimeter dimension of the shortest side plus the median
- The calculation includes:
- the length of the shortest side ,
- added to the median of the three principal dimensions.
Median: (L + W + H) ÷ 3
Maximum dimension of the longest side
- Value corresponding to the largest of the three dimensions of the package (Length, Width, Height).
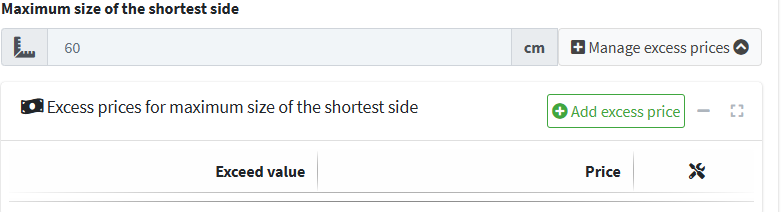
Maximum size of the shortest side
- It corresponds to the smallest of the three main dimensions of the package.
Maximum dimension of the median side
- Intermediate value between the three measures:
- Length (L),
- Width (W),
- Height (H).
Maximum size of the 3 sides
- The largest measurement is considered between:
- Length (L)
- Width (W)
- Height (H)
4. Some couriers allow the shipment of packages exceeding the standard size limits, applying a surcharge to the shipping cost.
5. To configure parameters above the standard limits, select the “Manage excess prices” option
6. Set the size threshold in the “Exceed value” field and specify the corresponding surcharge in the “Price” field.
Example: for a maximum length of 110 cm, indicate €50 as the surcharge.
Setting options supported in the courier service
1. The fields described below complete the shipping service configuration. Set each option according to the needs of the requested service:
- This Service is a trackable shipment.
Set to Yes to activate parcel tracking via the Cloud App platform. - This service allows cash on delivery.
Set to Yes only for shipments made within Italy. - Multi-Package Management
Set to Yes to split the shipment into multiple packages belonging to the same order. - This service allows insurance.
Set to Yes if the service includes insurance coverage on shipped packages. - Request Immediate Label
Activate this option to automatically generate the label as soon as the shipment is created, speeding up the operational process.

How to complete the customs declaration
1. If the shipment is directed to non-EU countries, the user can automatically complete the customs declaration or fill it in manually using the drop-down menu.
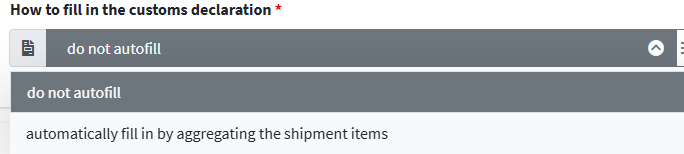
2, Then select the right menu 
3. Fill in all the information required for the customs declaration pre-set .
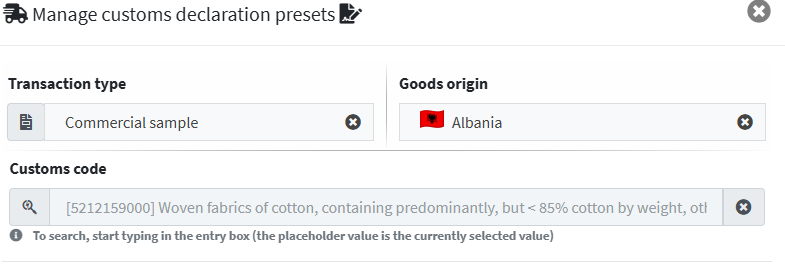
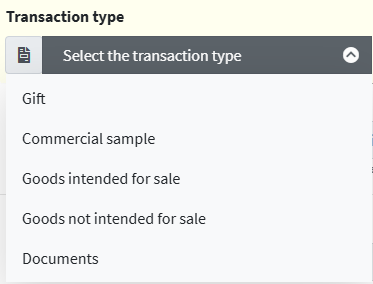
4. The Nature of Transaction drop-down menu shows the nature of the product being shipped (gift, commercial sample, goods intended for sale, goods not intended for sale and documents).
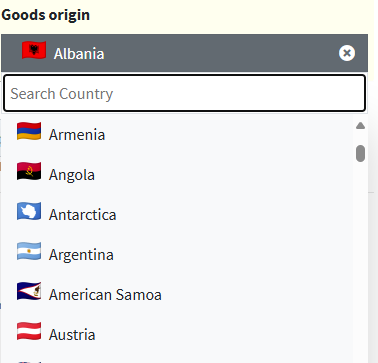
5. In the Origin of goods drop-down menu , select the country from which the goods originate.
6. The Customs Code field is used by the user to search for the specific TARIC code (📄 TARIC Codes ) based on the nature of the goods (e.g. entering Ceramics will list all the customs codes for ceramic products).
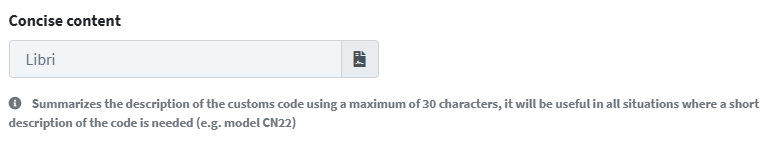
7. In the Summary Content field , enter the specificity of the product (e.g. ceramic vases).

Inserting shipment into the manifest
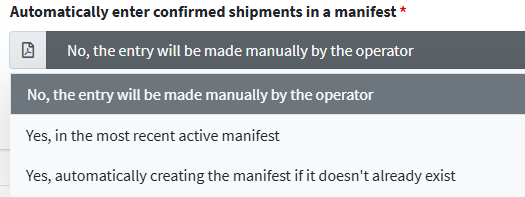
1. From the " Automatically insert shipments into a manifest" drop-down menu, you can choose whether to automatically fill in the manifest, choosing the most recent one, or automatically creating the manifest if it isn't already present. The default is for the operator to manually enter the manifest.
Available options :
- No, manual entry by the operator: the user will have to add the shipments manually.
- Yes: confirmed shipments are recorded directly in the manifest.
- Yes with bordereau creation: if not present, the bordereau will be created automatically
Label Request
1. The Advanced "Process" section allows you to manage options related to requesting labels and pickup confirmations in advance, as well as automatic integration into the manifest.
Request the label as soon as possible
- Yes: For operational flows that require immediate label issuance.
- No: If the label issuance is managed manually.

Defines whether confirmed shipments are automatically integrated into the manifest.
- Available options :
- No, manual entry by the operator: the user will have to add the shipments manually.
- Yes: confirmed shipments are recorded directly in the manifest.
- Yes with bordereau creation: if not present, the bordereau will be created automatically
Confirmation / withdrawal request
1. Enable advance confirmation or pickup requests. This is useful when the process isn't automatic.
It must be selected manually if the system does not perform the request automatically during manifest creation.
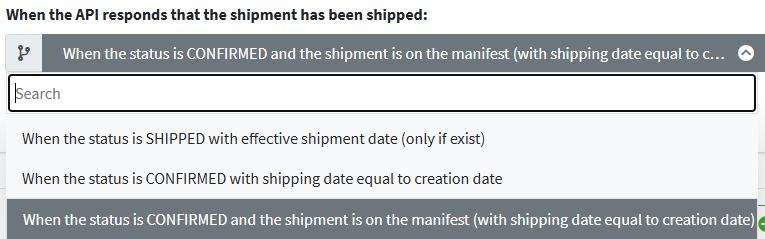
When the APIs respond that the shipment has been shipped , the system detects and interprets the shipment status based on the responses provided by the carrier APIs.
The main update scenarios are described below:
Status: SHIPPED with Actual Shipment Date (if available)
- When the APIs return the status “Shipped” , the platform detects that the shipment has been taken over by the courier.
- If the actual shipping date is present in the payload , this is recorded in the system as a logistics reference.
- This update may impact the calculation of delivery times and trigger notifications or tracking flows.
Status: CONFIRMED with Shipping Date equal to Creation Date
- Indicates that the shipment was confirmed at the time it was created in the system .
- The label is automatically generated upon insertion.
- This configuration is typical of automated flows , with high efficiency and reduced process times.
Status: CONFIRMED and Shipment Present in the Manifest with Shipment Date equal to the Creation Date
- The shipment is confirmed , inserted in the manifest and the shipping date coincides with the order creation date.
- The system has activated automatic shipment generation, immediate label release, and manifest integration.
- This process means that no manual operations were necessary : all management was performed synchronously.
2. Click Save Step and Continue to move to the next step
Routes served
1. Within the Routes Served parameters , the active logistics routes between specific countries are configured.
This section allows you to set the origin (FROM) and destination (TO) routes which determine the geographical areas covered by the shipping service.
The main page displays the list of target groups.

2. To view the preset route click on the Manage Country List button 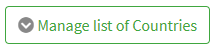
3. The user now has the option to view an information screen that presents:
- The country of origin of the shipment , currently set to Italy
- The list of available destination routes , configured in the system

4. Depending on the country selected , there may be geographical areas excluded from the shipping service. To define them, click under the Zones heading. 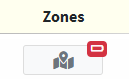
5. Within the definition page , the operating parameters are available that allow you to select the geographical areas to exclude from the shipping service.
6. Click on Add group of postcodes to define the postcode groups to exclude.
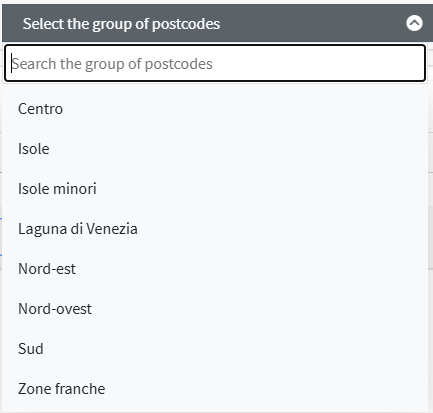
7. Within the section dedicated to configuring exclusion zones , there is a drop-down menu that allows you to select different types of geographical areas to exclude from the service.
- Province
Allows you to exclude a single province from the shipping service. - Region
Allows you to exclude an entire region belonging to the selected country. - Zone
Used to exclude a macro-geographical area , such as North , South or Islands .
8. After selecting an exclusion group from the drop-down menu, the system displays, on the right side of the screen , the specific options related to the choice made.
In this case, when requesting the exclusion of a zone, the menu is as follows:
9. Click Add to return to the previous menu
10. In the summary, choose whether to include or exclude the area from the shipping service.

11: After configuring the exclusion of a geographical area from the shipping service, the system displays, under the "Search the list of postcodes" section , the complete list of postal codes :
- Included in the service : postcodes belonging to the areas still served
- Excluded from the service : Postcodes relating to areas deactivated through the configuration
This feature allows for a detailed check of service coverage at local level.
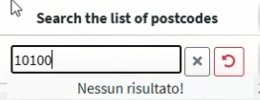
12. It is also possible for the user to enter a specific postcode to verify its effective exclusion.
13. Another way to define the areas to be excluded from the shipping service is to use postcodes .
Through this function, it is possible to configure the targeted exclusion of one or more ZIP Codes (Postal Codes), improving control over territorial coverage.

14. Click Add new postcode to add a postcode to exclude 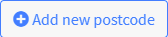
15. Enter the postal code in the required field 
16. Then choose whether to include or exclude that postcode.

17. When configuring the ZIP codes to exclude , you can use the “Starts with” option to manage exclusions based on the initial portions of the ZIP code.
- If you want to exclude all postcodes that begin with a certain number sequence , simply indicate it in the appropriate field.
- Example: by selecting “Starts with: 101” , the system will exclude all areas whose postcodes begin with 101 (e.g. 10100 , 10121 , 10145 , etc.).
This mode allows for broad and flexible exclusion on a territorial basis, avoiding the need to manually indicate each individual postcode.

18. The system allows you to define areas excluded from the shipping service based on both the country of departure and the country of arrival . For each route, you can specify the areas to be excluded based on the location of the sender or recipient . Exclusions can be applied at the country , region , province , zone , or postal code level . This dual configuration ensures flexible and targeted management of geographic coverage, optimizing the service according to operational needs.

19. Click Save Step and Continue to move to the next step 
Prices
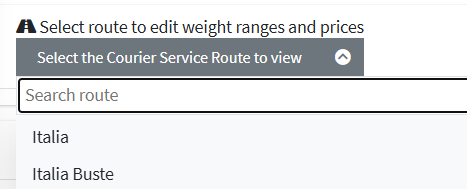
1. After configuring your shipping routes, you need to assign the corresponding prices by accessing the configuration page. Select the desired route from the "Select route to edit weight ranges and prices" drop-down menu to proceed with setting the weight ranges and corresponding costs.
2. Once you have chosen your preferred route, the weight and price ranges are displayed.
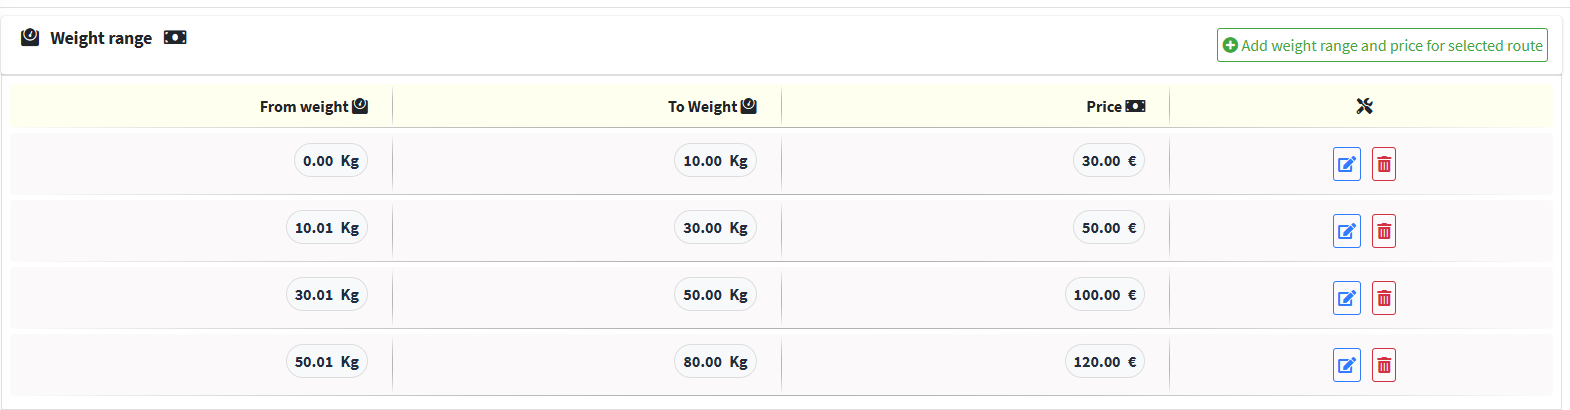
3. To upload new weight and price ranges click on Add weight and price range for the selected route 
4. To add a new Weight and Price Range, fill in the required fields by entering the From Weight To Weight and Price thresholds .

Confirm with Save and Close
5. In the “Price surcharges for excess weight” field, you must indicate the surcharge to be applied if the weight of the shipment exceeds the predefined range .

6. There is also a simulator to help the user check whether he has set the supplement correctly.
Click Simulate Price Calculation to start the simulation.

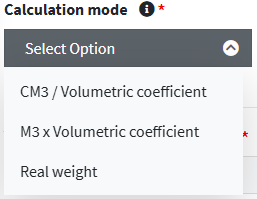
7. It is also possible to determine the shipping cost based on the volumetric parameter.
8. Access the “Calculation mode” drop-down menu to choose between the two available options :
- CM³ / Volumetric coefficient : the volume of the package is calculated by multiplying the length, width and height, expressed in centimetres, obtaining a value in cubic centimetres (cm³).
- M³ × Volumetric coefficient : the dimensions of the package (length, width and height) are expressed in meters and multiplied to determine the volume in cubic meters (m³).
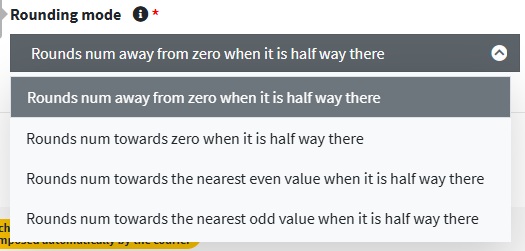
9. In the “Rounding mode” drop-down menu you can apply the roundings provided for by the parameters established by the Courier.
10. In the case of multi-package shipments, the user can define whether to calculate the price of the single package and add the prices ( Sum of costs ) or add the weights to calculate the overall cost of the shipment ( Sum of weight ).
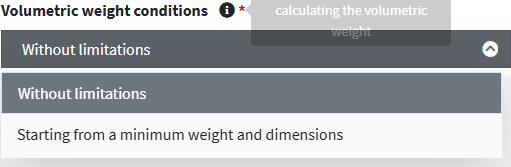
11. In the “Conditions for calculating volumetric weight” drop-down menu, the user can select one of the following modes:
- No restrictions : The default option. Dimensional weight is always calculated, regardless of the actual weight or dimensions of the package.
- Starting from a minimum weight and dimensions : In this mode, the volumetric weight calculation is applied only if the package exceeds specific weight or volume limits. Some couriers have thresholds below which the volumetric weight is not charged.
12. Click Save Step and Continue to move to the next step 
Supplements
1. Once your pricing parameters have been processed, you may need to apply additional surcharges.
2. The configuration page features seven options for defining shipping surcharges. Each option corresponds to a specific type of surcharge:
- Cash on delivery supplement : applies when the customer chooses payment on delivery.
- Insurance Supplement : This is applicable if an insurance option is added to the package.
- Fixed Surcharge : Allows you to set a fixed increase to apply to all shipments.
- Climate Supplement : dedicated to compensating for the kg of CO₂ emitted during transport.
- Cash on Delivery Surcharge (%) : calculated as a percentage of the amount to be paid on delivery.
- Insurance Supplement (%) : calculated as a percentage of the insured value of the package.
- Fuel Surcharge : Varies depending on the increase in fuel costs.

3. To complete the configuration of shipping services, click on the I'm done button