Order normalization
Introduction
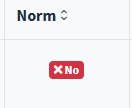
When an order requires data normalization , the system signals this with a red icon located in the "Normalization" column .
By hovering the mouse cursor over the icon , an information message is displayed containing a detailed description of the error to be corrected, making it easier for the operator to intervene.
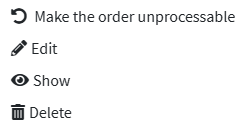
In the order summary screen, at the end of each row is the Actions button , represented by a green stock market icon. Clicking it opens a menu with various options:
- Make order unprocessable : excludes the order from operational management, useful for example if you do not intend to proceed with the shipment.
- Edit : Allows you to manually edit the order data.
- Show : Allows you to view the order details.
- Delete - Permanently removes the order from the list.
Change order
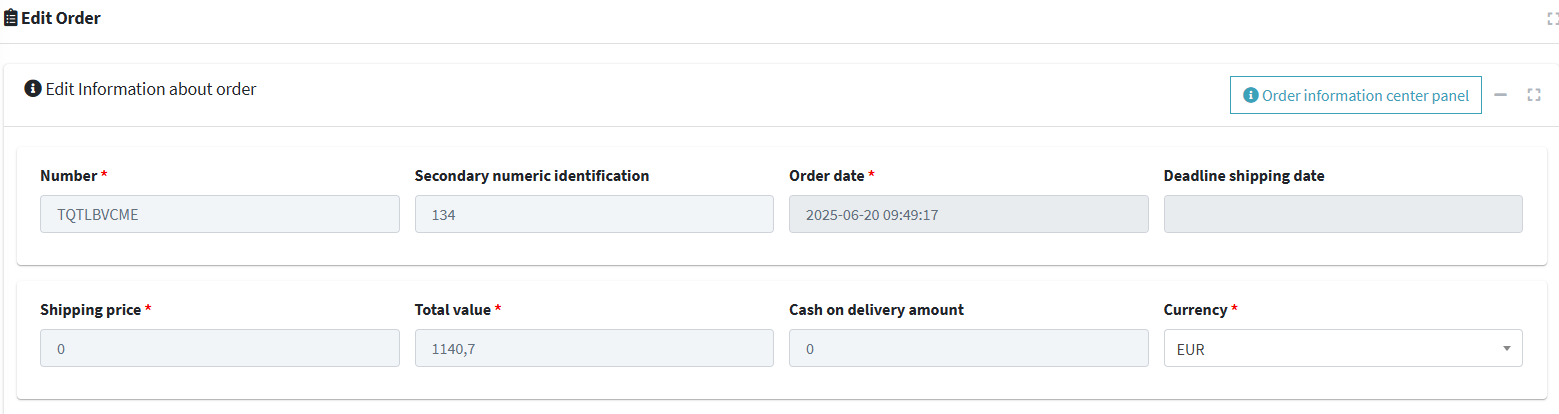
1. Click Edit in the Actions menu to view and edit the order parameters.
2. Once you have entered the order modification screen , the user can consult the following summary information at the top:
- Order number : the main order identifier, unique in the system. It is used to track and associate the order with logistics and administrative activities.
- Secondary numeric identifier : any additional code used for external connections (e.g. ERP system or e-commerce reference).
- Order Date : The day the order was entered into the system. Useful for timing calculations and statistics.
- Shipping deadline : The deadline by which the order must be processed or handed over to the courier. This is used to monitor compliance with deadlines.
- Shipping Price : Cost associated with the shipping service for that order, may vary depending on the carrier or destination.
- Total Order Value : The total amount of the order's contents, useful for financial reporting and revenue analysis.
- Cash on delivery amount : amount that the courier will have to collect upon delivery, if cash on delivery is available .
- Currency : reference monetary unit for all amounts (e.g. EUR, USD), important in international contexts.
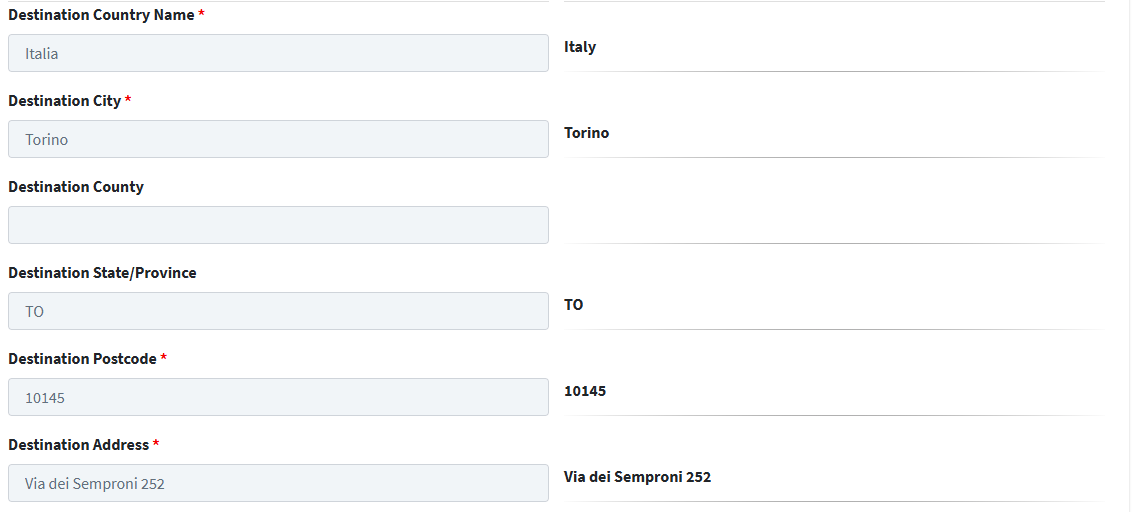
3. The lower section of the screen displays information about the order's destination.
- Recipient's name : This indicates the natural person who will receive the goods. This is essential for the courier to ensure proper delivery.
- Address Type : Specify the nature of the address (e.g., residential, business, pickup point, etc.). This field may affect the choice of courier and delivery time.
- Destination Company : If the order is for a company or organization , the company name is indicated. This field is useful for B2B orders or shipments to organized organizations.

4. While verifying your order, the system may display a red message on the screen with the text:
"The normalization process returned the following errors."
This message indicates that the order has not passed the normalization check , and that anomalies or inconsistent data are present .
The system provides a detailed description of the cause of the error , visible directly on the screen, to facilitate operator intervention.
5. In the section below we find the shipping contacts and addresses (in the example, the email address must be corrected in this section).
In the example, the email address was missing, which had been set as mandatory in the previous normalization settings.

6. Once you have entered the email address, click on the Normalize destination button
7. The message Normalization completed appears at the top.
8. Going back to the order list, it is now normalized.
Forced normalization
1. Another normalization method is manual intervention: by accessing the order changes, you can click on the red 'Normalize the destination manually or modify ' button located at the bottom of the screen. 
A screen indicates where normalization can be forced by manual data entry.

2. Returning to the main screen, in the list the order is indicated with a yellow icon as manually normalized.
In both cases ( 
 ) of normalization these orders can generate Shipments .
Shipment Creation
1. Once the orders are in a normalized state, they are ready to be shipped. Refer to the guide 📄 Creating Shipments
Assisted creation
1. Click on assisted shipping to access the configuration.
Aggregate mode
Refer to the manual 📄 Creating shipments from aggregated orders
Automatic creation
1. When you select the Automatic shipment generation mode , the system will immediately create shipments for all orders that are:
- correctly normalized
- selected from the operational flow
This automation allows for faster logistics management, reduced manual intervention, and guaranteed timely order fulfillment.
See the guide 📄 Automatic shipments