Registro Arrivi
Introduction
The Arrival Log section allows you to view, manage, and record warehouse arrivals.
From this screen you can:
- See the list of expected and actual arrivals.
- Filter your results by specific criteria.
- Add a new arrival manually.
Configuration
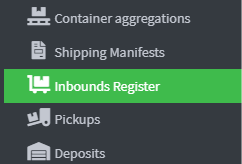
1. Click on the Inboud Register item in the left menu under the Operations item.
2. The table shows the arrival details organized by columns:
- ID → unique arrival identifier.
- Warehouse → destination warehouse.
- Status → current status of the arrival (e.g. pending, confirmed, completed).
- Estimated arrival date and time → estimated delivery time.
- Actual arrival date and time → actual time the goods were received.
- Courier → name of the courier or freight forwarder.
- Actions → Quick buttons to edit, delete or manage the arrival.

3. To add a new arrival, click on Add Arrival to Warehouse at the top right. 
4. On the “Enter new arrival” page there are fields for filling in and configuring new arrivals in the warehouse
5. In the Warehouse field, select the destination warehouse from the list.

6. In Entry position, indicate the internal entry point to the warehouse (e.g. door, loading bay).

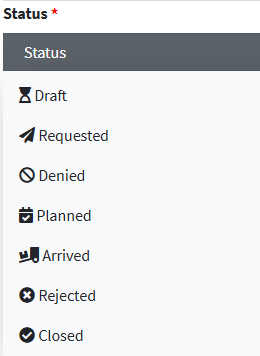
7. When inserting or updating an arrival, the Status field must be selected from the drop-down list. Each status identifies the phase of the logistics process:
- Requested: The arrival has been recorded as a request, awaiting scheduling or approval.
- Denied: The arrival request has been rejected and will not be handled by the system.
- Scheduled : Arrival has been scheduled with a specific date and time.
- Arrived : The goods have physically arrived at the warehouse and the actual time has been recorded.
- Refused : The goods were rejected upon delivery (e.g. non-compliant, incorrect order).
- Closed : The arrival has been completed and archived, no further action is required.
8. Estimated arrival date and time Enter the date and estimated time the goods should arrive.

9. Actual arrival date and time must be filled in when the arrival was actually registered at the entrance.

10. Courier Enter the name or contact information of the courier making the delivery.

11. Return select Yes/No to indicate whether this is a return. 
12. Notes: Free space for additional notes (e.g. condition of the goods, special instructions).
13. Click Save All and Close to complete 
Management of incoming goods in the warehouse
1. In the Actions column of the main table of the Arrival Register, there is an icon that allows you to directly manage the receipt of goods. 
2. After clicking on Manage warehouse incoming goods , you will access the details of the incoming position.
3. Click Add Container to create a new container (box, pallet, etc.) to record the received goods. 
4. When recording an arrival, you can associate one or more containers (boxes, pallets, etc.) to physically describe how the goods are packaged.
5. In the input window, fill in the fields for configuring the container.
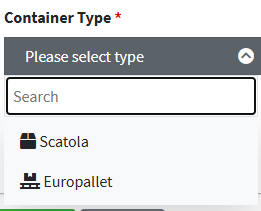
6. In the Container Type drop-down menu, choose the type of container you want to configure.
7. Configure the container's size and weight parameters:
- Length, Width, Height (in cm) → dimensions of the container.
- Weight (Kg) → total weight of the container.
- Tare (Kg) → weight of the empty packaging (box or pallet).
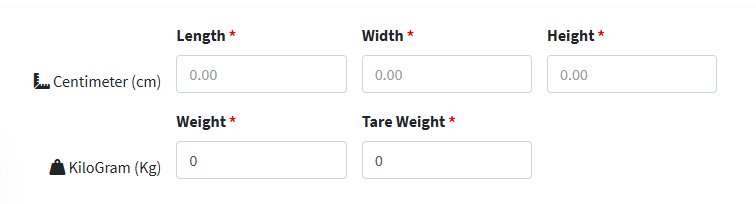
Operational notes :
- Measurements must be entered carefully to ensure correct warehouse space calculation.
- Tare is important to distinguish the net weight of the goods from the gross weight.
- Each container created can contain one or more items (see the “Manage Items” section).
8. Click Create to confirm and add the container upon arrival. 
9. Each container entered (box, pallet, etc.) appears in the list with the following information:
- Progressive ID (e.g. 0, 16).
- Container type (Box, Euro pallet).
- Number of items included (e.g. “Items (2)”).
- Validation indicates whether the container has been correctly registered.
- Operational status such as Completed .
- Lock/Unlock indicates whether the container is editable.
10. For each container the following options are present:
- Divisible/Not divisible
- Divisible : the container can contain multiple types of items (different SKUs) and can therefore be opened and the products placed in the warehouse.
- Indivisible : The container represents a single, indivisible unit.
11. You can edit the container using the edit button 
12. You can also insert sub-containers using the Add Sub-container button 
13. After completing the registration and validation of all containers, click on the green Manage warehouse incoming goods storage button.

13. The Inbound Storage Management screen opens , showing the containers completed and ready to be placed in stock.
From here you can:
- Confirm the storage of individual containers.
- Check the quantity, weight, and divisibility of the containers.
- Record any operational notes.
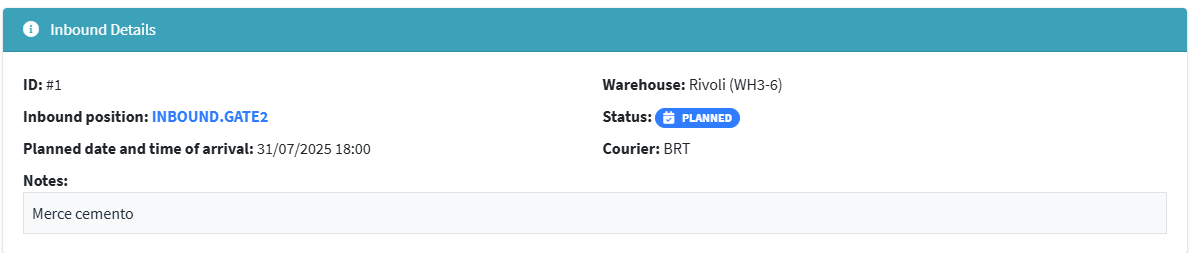
14. The Inbound Details at the top summarize the key information:
- ID : arrival identification number (e.g. #1).
- Entry position : identifies the entry position of the goods e.g. INBOUND.GATE2.
- Estimated Arrival Date and Time : The scheduled time for delivery.
- Warehouse : destination location (e.g. Rivoli).
- Status : The status of the arrival (e.g., Planned, Completed).
- Courier : carrier responsible for delivery.
- Notes : any comments or descriptions (e.g. “Cement goods”).
15. In the Containers ready for storage section (completed containers only) , all containers that have passed the incoming phase and are valid for warehouse storage are shown.
Available columns
- ID → container identifier.
- Container type → e.g. Box, Europallet.
- Items → number of unique items in the container.
- Total Quantity → sum of the physical units contained.
- Dimensions → measurements recorded in cm (length x width x height).
- Weight → gross or net weight (if recorded).
- Divisible → indicates whether the container is Divisible or Non-divisible .
- Actions → 📦 icon to confirm storage of the single container.
16. In the Actions column of the list of containers ready for storage, there is a blue Manage Container Storage icon. 
17. When you click on the icon to manage the storage of a container, the details open with the information about the container and the products included.
- Container Type : type of container (e.g. Parcel, Euro pallet).
- Dimensions : recorded measurements (e.g. 10x10x10 cm).
- Warehouse : destination location.
- Weight : If set, indicates the gross/net weight.

18. For each item registered in the container the following are shown:
- Product name and SKU (identifying code)
- Link to product configuration.

- Total quantity total quantity recorded.
- Quantity stored quantity already transferred to stock.
- Remaining quantities to be stored still to be placed in the warehouse.
- Unit value economic value of the single piece.

19. When you click Load next to an item, the detail window opens to confirm the stock movement. 
20. In Destination Location, select the warehouse location where the item will be stored.
21. In Quantity to load into warehouse, indicate how many units to put into stock (it cannot exceed the “Available”).
22. In the Batch field, if applicable, select or enter the batch to which it belongs for traceability.
23. Current Stock shows how many units are already present in the chosen location.
24. Notes space to add any comments or operational information.
25. Click Save Inventory Movement to complete.
Incoming Item Management
1. Click the Incoming Item Management icon on the Incoming Log List page . 
2. On the summary page, click the red icon under the Actions tab to access the incoming goods label printing menu.
3. The Print Labels function allows you to generate identification labels for received products, useful for internal handling and traceability in the warehouse.
- Incoming Item → product name and code (e.g. Test Product 001).
- Warehouse → destination warehouse (e.g. Rivoli).
- Available Quantity → number of pieces available to label.


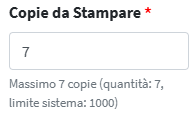
4. In the Copies to Print field, indicate the number of labels to generate for the item. (Maximum limit: 1000 copies per generation).
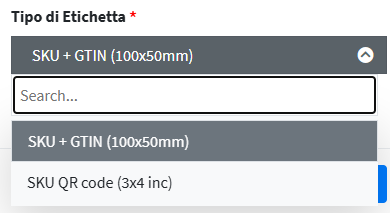
5. When you select the Label Type field , the system offers several standard formats for printing:
- SKU + GTIN (100x50mm)
- Classic rectangular label.
- Show SKU code and GTIN barcode.
- Suitable for identification on boxes, pallets and single packages.
- SKU QR code (3x4 inch)
- QR code label.
- Enables quick scanning via mobile devices or warehouse terminals.
- Useful for automated logistics processes or fast inventories.
6. Click Generate Labels to print the configured labels